Intro to Portrait Photography (with gear you already have) - Part 2 of 3
- Bryce Funk
- Oct 27, 2020
- 4 min read

The Shoot
Now that we have our gear, it is time to walk ourselves through a shoot. These next few sections contain key details that can set your portrait shoots and the images you create apart from the crowd. As with everything, at all starts with a good plan.
The Plan
This stage will determine the success of the shoot and it all boils down to two questions:
1. What does the client want?
2. How is the image going to be used?
If you can answer these questions and plan for how to shoot the image that you believe will satisfy these questions, your shoot has a much higher chance of producing the images you and your client want to see.
These are examples of questions I may ask myself and the client during the planning phase of a shoot:
- What is this for? Website? Acting headshot? LinkedIn profile? Flyer or poster?
- If these are for a website, where on the website? Cover page? Next to a bio?
- What is the final crop? Square? Landscape? Portrait?
- What does the client do? Teacher? Actor? Artist? Corporate professional?
- How can I make the tone of these images reflect their art, job, website, style, etc.?
- Does the client have any examples of images or styles they like?
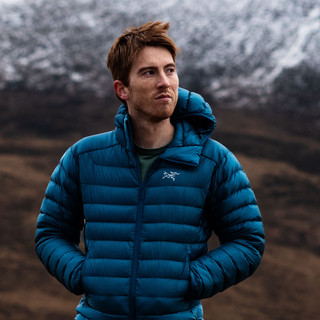
The most common question you as the photographer will get asked is, “what do I wear?” Rather than replying with, “whatever you want,” I recommend people wear something they love, their favorite outfit.
As a portrait photographer, you are trying to create an image that best reflects the character and personality of the person you are photographing; your favorite outfit is a favorite for a reason and it is usually the outfit that characterizes you the most. There are always exceptions, but this is a good place to start.
Once you have asked yourself some key questions, you will start to develop what you want the image to look like. So, what do you need to make that image a reality? What is the background? How is it lit? Rembrandt? Full, even light? Silhouette? Do I need a hair light? Soft box or umbrella? Where should my assistant hold the bounce sheet? This is where a lighting diagram comes into play.
Even if you are not using artificial light, you still need light. A lighting diagrams helps you draw out the shoot and work out the small details that spell the difference between perfection and catastrophe. Below are two examples of lighting diagrams, one for a shoot with two strobes, the other for a shoot using defused window light.


Now these may not be precise, but they offer a great starting place day of the shoot and a reference to use when looking back on the shoot later. Notice how the diagram for the natural light shoot includes times and positions of the sun, this is extremely important when relying on the sun. Unlike strobes, the sun doesn’t stay where you put it.
With my lighting diagram, I always include a gear list. Some shoots, it may seem obvious what you need, doesn’t matter! Make a gear list!

The Subject
The single most important detail to remember day of the shoot is to focus on your subject. The camera settings, lighting placement, exposure, depth of field, distance from background, everything is second to your subject. If your subject cannot be comfortable on-site, any attempt at capturing their true character and personality will be fruitless. This all starts the moment they walk into the room.
Thankfully, there are a few tricks to helping them relax and fell comfortable:
- Play some music: not at a distracting volume, just something to provide some ambiance. My personal favorite is The Beatles Abbey Road.
- Talk about the weather: maybe not actually the weather, but topics unrelated to the shoot. If they are a musician, ask them what piece they are working on. Small business owner, ask them about their shop. You asked a lot of questions to plan for the shoot, use that information to carry some normal conversation.
- Be humble: this shoot isn’t about you or your skills as a photographer. This is all about capturing the image of your subject.
- Wait to finish setup until they arrive: this one may seem a bit strange but trust me it can really help. If your subject is coming to your studio or meeting you at a location for a shoot, to them, it can be intimidating to walk into a room full of lights and other equipment while you and your assistant are standing around waiting for them to arrive. Set up the backdrop and the stands but wait to put the soft box on the stand or setup your tripod until they show up. It helps involve them in the process.
- Dress casual: something that conveys professionalism, but maybe not something you would wear to a business interview
Next week, we'll be posting the final essay in this portrait trilogy: Creating the Image. Stay tuned!


Comments