Intro to Portrait Photography (with gear you already have) - Part 1 of 3
- Bryce Funk
- Sep 4, 2020
- 6 min read

Equipment
Whenever I’m perusing YouTube or reading how-to articles, I am always leery of the Equipment section or the “WHY YOU SHOULD BY THE ______” videos(they are always in all caps). I’m not about telling people, “You need to buy the top of the line thing because…”, that’s just not my style. The work is about the craftsman not his tools. That said, this section on equipment is more about why you should consider using certain equipment – specifically focal lengths – for portrait photography and why you should avoid using others. Let’s start off with my favorite: the lens.
The Lens
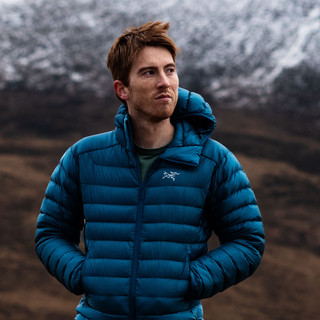
Portrait photography is all about accurately and genuinely portraying the appearance of your subject; that said, there are certain lenses which accomplish this better than others. Let’s look at figure 1:

The left most image was shot at 17mm, hardly a portrait length. Notice how oblong and elongated the head is vertically. The distortion from the glass wraps back of the head almost into the background. Specifically notice how the object closest to the lens, usually the nose, looks disproportionally large. Believe me, this is not how my wife looks in real life. Moving from left to right, we are increasing the focal length of the lens from 17mm, 35mm, all the way up to my favorite, 85mm. Notice how as the focal length increases, the figure of the head begins become more proportional and natural. 85mm and 105mm have been the status quo focal lengths for portrait photography since…well since glass was formed.
I personally shoot on a NIKKOR 85mm f1.4. Don’t let that scare you, I’m not telling you to go out and buy an expensive chunk of glass. The best lens is the one you already have. If you’ve got a lens that already has 85mm-105mm in the range, great! Start with that! If you’ve got a 24mm-70mm or 50mm or even a 35mm great! I’ve got plenty of examples of situations where a 50mm or a 35mm lens were great. But for headshots or the torso up length, lenses in the range of 70mm-105mm are what we are going for.
There are two reasons why portrait photographers use this range of lengths. The first, accurately portraying the proportions and appearance of your subject. The second, perhaps less intuitive, is the distance these lengths place you from your subject. When shooting a waist up shot of a subject, an 85mm lens places me about 12 feet from my subject. This is the goldilocks of distances: you are not too far as to isolate or abandon your subject but not so close as to freak them out.
What About Aperture
Good question! I could say, “the faster the better” but at the risk of losing your attention I will give a healthier explanation. (Quick note on what it means to be a “fast” lens. Fast or bright lenses have a wider aperture diaphragm or entrance pupil. That wider diaphragm is associated with lower f numbers. These lenses are referred to as “fast” because that wider diaphragm or entrance pupil allows more light through the lens allowing faster shutter speeds.) Fast is good, but sometimes too fast is not good. I shoot with an 85mm f1.4; however, I almost never shoot at f1.4. In fact, 60% of my shots are around f2.8, maybe 20% make it down to f1.8 (we will talk more about why when we talk about Depth of Field).
Truthfully, one of the greatest benefits of “fast” lenses is how bright they are while focusing. Bright lenses are a massive advantage when shooting portraits, especially around twilight or indoors at say a theater or sporting events.
But to answer your questions, to allow you the ability to have greater control over depth of field, you are looking at wanting a lens capable of shooting at f2.8. But don’t worry if you don’t have that! I’m going to show you some portraits that were shot a f8! (GASP!)
Let There Be Light
I love shaping light; it is one of the most fascinating aspects of portrait photography. Luckily, you don’t have to spend a fortune to have a small studio setup. I have two lights and usually only use one. My main light is a Godox AD200, the secondary light is a Nikon SB-800 speedlight. The Godox can run a bare bulb or a Fresnel head, adding versatility. At 200 watt/seconds the AD200 can battle a midday sun when shot at half to full power, great for outdoor portraits.

The AD200 is radio triggered and can support a multiple lighting setup. Radio triggering is really helpful if you plan on placing the light far away or around a corner out of line of sight.
The lights themselves are simple but what really makes the lighting kit work are modifiers. I have a 62cm octabox with a removable grid and a 6” bell with three removable grids. Depending on what type of portrait photography you prefer, shoot through or bounce umbrellas are an option for a fuller, wrap around light. For natural light, using bounce screens, are helpful to fill in shadows under the chin our on the side opposite the main light source.


Other Equipment (not required, often useful)
So, what else do you need for portrait photography? Rather than boring you to death, here is a short list with short explanations:
- A Camera: Go with what you have. If you are in the market for a camera, consider choosing something with an OLP (Optical Low-Pass Filter) or Anti-Aliasing (AA) filter. Portraits, even with an OLPF, can encounter this interesting phenomenon known as moiré, but that is another topic for another day. Interestingly enough, I find the crazy high-resolution cameras make portraits too sharp. But that is my personal preference.
- A Tripod: sturdy and stays in place, capable of reaching up to your eye level. Helpful while posing your subject.
- A stool: for your subject to pose or rest on
- Light stands: if you are using lights, light stands are a must. You can find inexpensive ones that get the job done. The nice ones provide extra height and rigidity. If you have nice lights, I recommend nice stands.
- Grey Card: these 18% grey slivers of cardstock are only $2.00 and save you lots of time in setting color with your portraits in post.
Setting up Your Camera
File Type, White Balance, Flash Sync, Minimum Shutter Speed, and Focus
In general, I shoot both RAW and JPEG. The RAW files I use for editing, the JPEGs are to give my client or viewer an image with some in camera processing providing some semblance of what the final portraits may look like. My RAW files are set to the max bit depth and uncompressed.
Though it should not matter at the shutter speeds we shoot at, the flash is set to rear curtain sync. White balance is set to flash, though this too does not matter; I use the grey card and curves to set the white balance in post.
If your flash is not equipped with HSS (High Speed Sync) be sure to know what your max sync shutter speed is – usually around 1/200th of a second. If you are unfamiliar with HSS, check out the figure below.

See the faint black line at the left of the frame, that is the flash casting a shadow from the shutter. The shutter speed was too fast and therefore began to close while the flash was still firing. Flashes supporting HSS can usually handle shutter speeds up to 1/4,000th of a second.
If your flash supports HSS or you are not using flash, you are only worried about the low end of your shutter speed. The rule of thumb is to not shoot at speeds less than 1/focal length. Hence if you are shooting with an 85mm lens, you don’t want to shoot slower than 1/85th of a second. In practice, to maintain the sharpest possible image, I do not like to go below 1/125th.
As far as focusing goes, if you are shooting mirrorless, chances are you have eyed detection autofocus, if so, use that. If you are shooting on a DSLR, I recommend single point, continuous focus. This allows you to focus on the eye and maintain that focus while pressing the shutter half down.
Wrap up
That is it for part one! Portrait photography may seem like a daunting style, but it is really just about capturing people and their emotion. Forget about the gear and focus on the person! We will be focusing more on planning the shoot and working with your subject in part two.
Excellent info. Thanks.